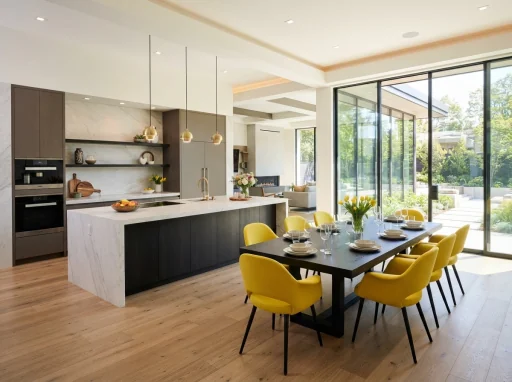
The best time to improve a kitchen is before the design is frozen. These fifteen decisions turn a visual proposal into a kitchen that can be built, used and maintained with confidence.
1–4. Plan the room around real movement
- Confirm the measured plan. Record wall lengths, ceiling height, windows, doors, beams, columns, plumbing and electrical points.
- Choose the layout from the room. A straight, parallel, L-shaped, U-shaped or island layout should follow available clearances and circulation, not a trend.
- Map the work sequence. Unpacking, washing, preparation, cooking and serving should not force repeated crossings.
- Protect clear movement. Open shutters, appliance doors and drawers must not block one another or the main passage.
Mark where two people are likely to work at the same time. That small exercise often reveals collisions a static 3D view will not.
5–8. Lock appliances and services early
- Select appliance types and sizes. Refrigerator, hob, chimney, oven, microwave, dishwasher and water purifier all affect the cabinetry.
- Plan power points. Separate fixed-appliance points from daily-use sockets, and keep them accessible without trailing cables across work zones.
- Confirm plumbing. Sink, purifier inlet, drain and dishwasher connections need coordinated positions and service access.
- Resolve ventilation. Confirm the chimney route and any window or exhaust constraints before upper cabinets are finalised.
9–12. Design storage by contents
- Inventory everyday items. Plates, cookware, spices, provisions, small appliances and cleaning supplies need different access.
- Put frequency before symmetry. Daily items belong between comfortable knee and shoulder height; occasional items can go higher or lower.
- Use drawers where visibility matters. Deep drawers can make cookware and provisions easier to see than shelves behind hinged shutters.
- Give awkward items a home. Pressure cookers, large pots, trays, bottles, bins and cleaning tools should be drawn into the plan.
A storage plan is strongest when cabinet names describe their contents, not merely “base unit” or “wall unit.”
13–15. Specify the surfaces and the handover
- Match materials to exposure. Discuss moisture, heat, cleaning products, edge treatment and expected maintenance for carcasses, shutters, counters and backsplashes.
- Layer the lighting. General light, counter light and task light solve different needs. Check that your own shadow will not fall on the preparation area.
- Define installation and checks. The scope should name delivery, fitting, cut-outs, silicone, appliance coordination, alignment checks, cleaning and snag closure.
The drawing set to request
Before approval, ask for a measured plan, elevations of each wall, appliance schedule, electrical and plumbing points, internal cabinet layouts, finish schedule and countertop or backsplash details. A rendered view helps you understand appearance; technical drawings help the team build it.
COMMON QUESTIONS
Before you move ahead
Which modular kitchen layout is best?
There is no universal best layout. The right choice depends on wall lengths, openings, service points, circulation and how many people cook together.
When should appliances be selected?
Choose appliance types and preferably exact models before cabinetry is frozen, because dimensions, clearances, power and ventilation requirements affect the design.
Are 3D views enough to approve a kitchen?
No. Use 3D views for appearance, but approve the project with measured plans, elevations, internal layouts, service drawings and a material schedule.